Deluge is a BitTorrent client written in python based on libtorrent. Deluge is my favorite BitTorrent client because it’s got some great features like:
09/08/16 – Updated for Deluge 1.3.13 – Tested on Debian 8/Ubuntu 16.04
- It’s Fast!
- Full Encryption Support
- Cross-Platform Support
- Thin Client Mode
- Great Web-UI
- Plugin System
Not only have I found Deluge to be faster than many of the other BitTorrent clients that I have tried but, it’s also simple to setup and reasonably lightweight in terms of resources. Packaged versions of Deluge can be a bit old and not up to snuff, so I’ve written a simple bash script that will automatically install the latest version of Deluge from it’s source. The entire process, on a freshly installed VPS, takes approximately 5 minutes.
Script Usage: This script is designed to be run on a freshly installed VPS, it has been tested on Debian 6/7/8 and Ubuntu 12.04/13.10/14.x/15.x – All other distributions are unsupported at this time.
wget www.sonicboxes.com/scripts/deluge_webui.sh
chmod 755 deluge_webui.sh
./deluge_webui.sh

You will be asked to create a user for Deluge to run as.

When the script is finished, you may access Deluge at http://<Your IP>:8112
Deluge Configuration:
Now that we’ve got Deluge installed, we should perform some the basic configuration tasks. Select Preferences on the top bar to bring up the menu, the first thing I always do is enable Encryption.
Encryption 
The basic Encryption settings are:
- Forced – Only encrypted connections are allowed. Incoming connections that are not encrypted are closed if the encrypted outgoing connection fails, a non-encrypted retry will not be made.
- Enabled – Encrypted connections are enabled, but non-encrypted connections are allowed. An incoming non-encrypted connection will be accepted, if an outgoing encrypted connection fails, a non- encrypted connection will be tried.
- Disabled – Only non-encrypted connections are allowed.
I typically go with Forced encryption on both Incoming & Outgoing connections, the downside to this is that it places more load on the processor and there are technically less available Peers. For the best possible incoming connection, you should select Enabled, not Forced.
See this link for more information on the possible Encryption settings:
http://www.rasterbar.com/products/libtorrent/manual.html#pe-settings
Bandwidth 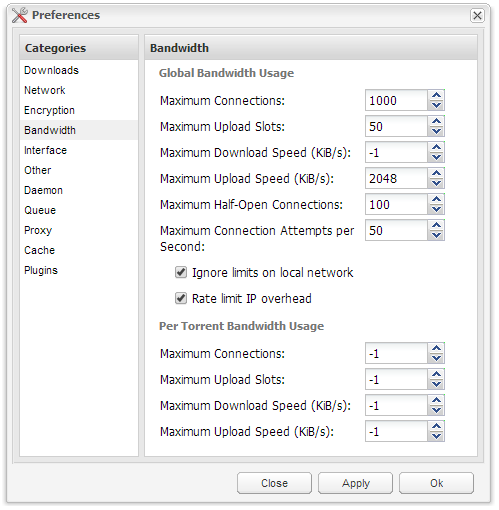
The next step is to adjust the various connection settings to meet your needs. By default Deluge will limit you to 200 connections, unless you’re only downloading one well seeded torrent at a time this is far from adequate, I typically set Maximum Connections to between 500 and 1000, depending on the server specs. If you plan to do some seeding, you’ll want to raise the Maximum Upload Slots from the default 4 to a more respectable number, say 25 or 50. It would also be advisable to limit your Maximum Upload Speed so you do not burn through a month’s bandwidth in a few days, I typically set this to between 2048KB/s and 4096KB/s, this is 16 and 32 Mb/s, a respectable number for uploading while ensuring you’re not hogging the port. I do not place any per torrent based limitations, however if you’re seeding many torrents, i.e. more than 100, at any one time you may way to limit the Maximum Upload Slots or Speed per torrent to ensure your bandwidth is being spread out evenly.
Queue
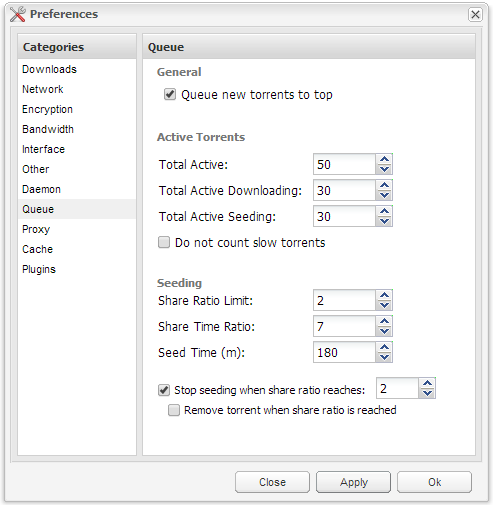 This section is rather self explanatory, set Total Active torrent to the maximum number of torrents you’d like to Seed or Leech at once, I typically set this between 25 and 50, but I am not a heavy seeder. If you do a lot of seeding you should probably set your Total Active between 100-200 along with your Total Active Seeding. Keep your resources in mind when you make these settings, a 128MB VPS will not be happy with over 100 active torrents. If you plan on using Deluge’s auto-managed seeding, you should enable Stop Seeding When Ratio Reaches: <desired ratio>.
Network 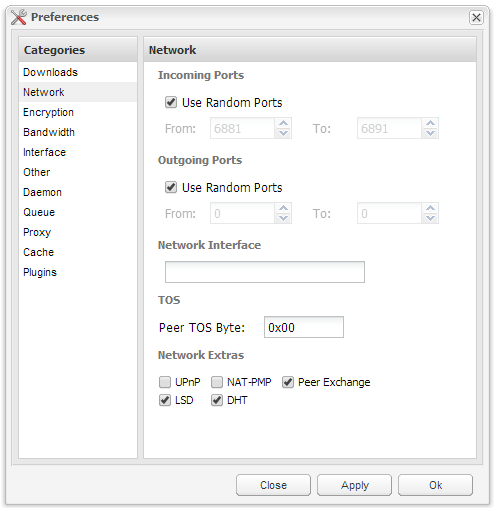
This section can be quite important, I typically go with Random ports as there are no firewall limitations in place, however if you plan to run a firewall on your VPS, such as CSF, you’ll want to use a fixed port for incoming and outgoing. If you only seed on a private tracker, make sure you disable Peer Exchange, LSD and DHT, these will get you banned on a private tracker as you may be sharing with others outside the site, and alter your tracker ratio. Almost all private trackers will direct you to disable any kind of peer sharing. If you don’t use private trackers you should leave these enabled to ensure the maximum number of possible seeds.
ThinClient/Daemon Configuration 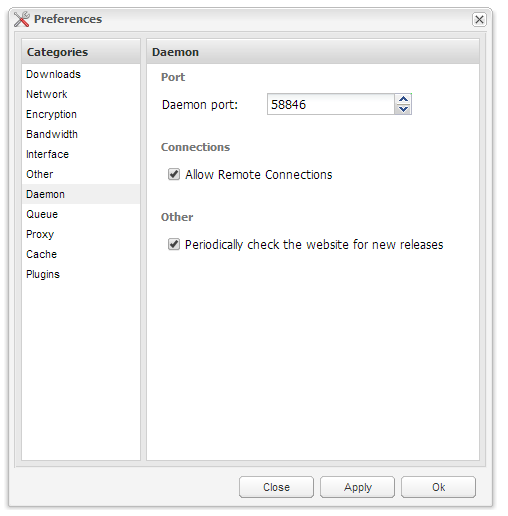
This is one of the neatest features about Deluge, you can use a local GUI client instead of the WebUI to download torrents remotely onto your VPS. There are two ways to go about this, one way is to use a VPN or SSH tunnel to connect to your VPS and then connect to the Deluge daemon locally. The easier method is to check Allow Remote Connections as shown above. Now you’ll need to install Deluge on your PC. Once installed, go to Edit >> Preferences >> Interface – You need to uncheck Classic Mode Enable. Deluge will restart after you have applied this change. Now you need to add an authenticated user, you’ll do this by going to your Deluge user’s home directory. If the user you created was deluge-torrent, it would be: cd /home/deluge-torrent/ Add your new user to the auth file like so:
echo "username:strongpassword:10" >> ./.config/deluge/auth
## Restart Deluge ##
/etc/init.d/deluge-daemon restart
Now go back to your desktop Deluge and setup the connection to your server, 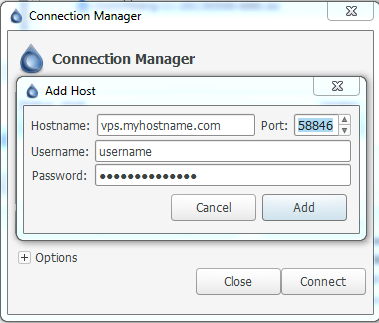
If you’ve done everything correctly, you should see a green dot next to your hostname and you’ll be able to hit Connect. 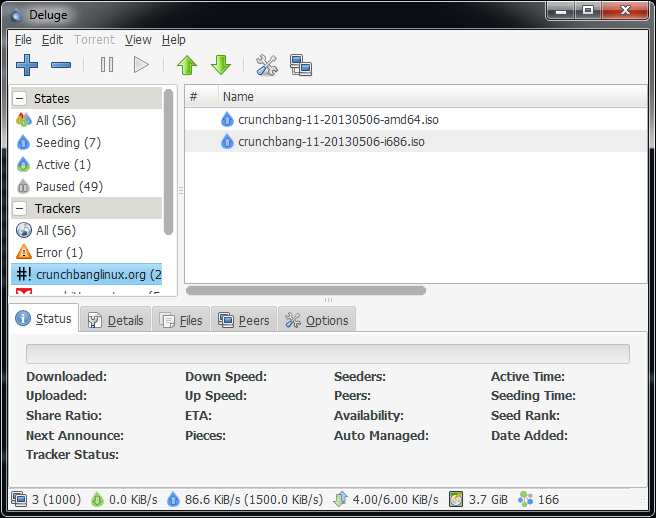
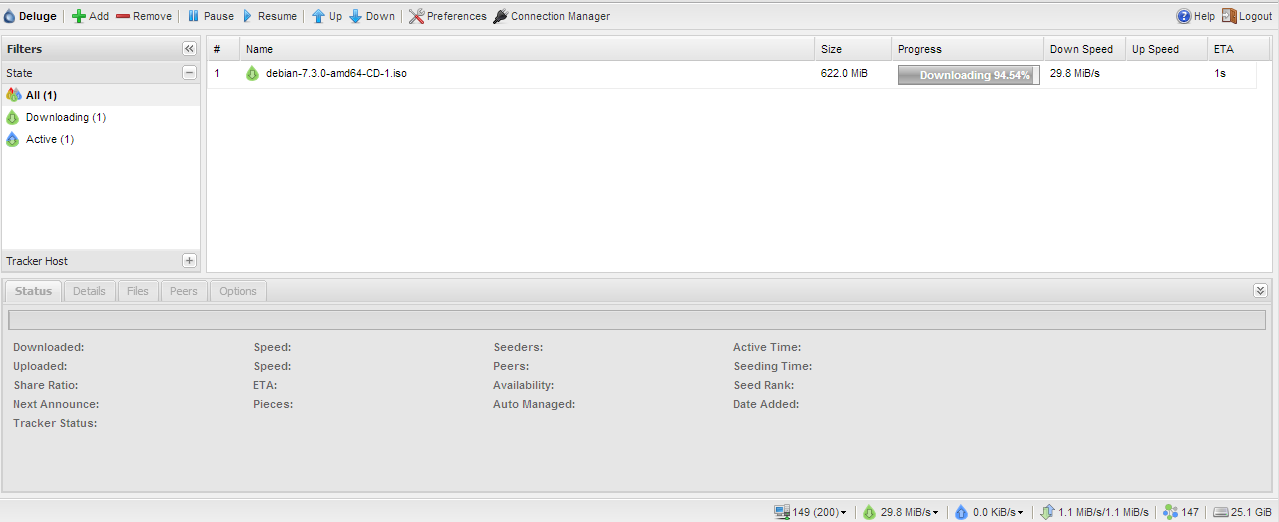
That’s it, you should now be staring at your Deluge ThinClient. You can add torrents, start, stop, remove, everything you would normally do except that it will be on your remote server. Using this method you can also use one Web-UI to manage multiple Deluge daemons, simply add them using the Connection Manager.
FAQ / User Guide: For further information about Deluge, including the official FAQ and User Guide, see the official Deluge website located here: http://dev.deluge-torrent.org/wiki/UserGuide
Leave a Reply