If you want a lightweight, self-hosted seedbox, Deluge is a great option; it’s a Python-based BitTorrent client with a powerful Web UI and solid community support.
In this guide, we’ll move beyond a basic Deluge environment by securing remote access to the web interface by using Nginx as a reverse proxy and encrypting all traffic with HTTPS via Let’s Encrypt SSL.
This powerful combination not only secures your torrent client but also provides a method to manage your downloads remotely and view the finished files directly on the server via HTTPS or SFTP (FTP over SSH).
Requirements
- Server/VPS with at least 1 GB of Memory.
- Root (sudo) access.
- A compatible OS:
- Debian 13 (Trixie)
- Ubuntu 22 (Jammy)
- Ubuntu 24 (Noble)
- Fully Qualified Domain Name (FQDN) pointed to the Server’s IP via A/AAAA record.
- ex.
server.ts4.net has address 192.249.57.21
Step 1: Install Deluge
First, we’ll install the Deluge packages from the repository.
Debian 13
Debian 13, no adjustments are needed.
sudo apt-get update
sudo apt-get upgrade -yV
sudo apt-get install deluged deluge-web -y
Ubuntu
For Ubuntu, the official repositories often lag behind the latest Deluge releases. To ensure you get the newest stable version, add the official Deluge PPA.
sudo apt-get update
sudo apt-get upgrade -yV
sudo add-apt-repository -y ppa:deluge-team/stable
sudo apt-get install deluged deluge-web -y
If you get an error like:
add-apt-repository: command not foundInstall the software-properties-common package first (older articles may reference python-software-properties).
After the Deluge package install is complete, confirm the versions:
deluged -V
deluge-web -V
You should see something like Deluge 2.2.0 rather than the outdated 2.1.x from the Ubuntu repos.
# deluged -V
deluged 2.2.0
libtorrent: 2.0.10.0
Python: 3.12.3
OS: Linux Ubuntu 24.04 noble

# deluge-web -V
deluge-web 2.2.0
libtorrent: 2.0.10.0
Python: 3.12.3
OS: Linux Ubuntu 24.04 noble
Step 2: Create a Dedicated Deluge User
For security, run Deluge under its own system account.
sudo adduser --system --gecos "Deluge Service" --disabled-password --group --home /var/lib/deluge delugeIf you want to manage downloads with another user (e.g., myftp), add them to the deluge group:
sudo adduser --ingroup deluge --gecos "Deluge Download User" myftpSet Up the Downloads Directory
Now that both users have been created, we can configure Deluge’s default download directory and create a placeholder file:
sudo -u deluge mkdir /var/lib/deluge/Downloads
sudo -u deluge touch /var/lib/deluge/Downloads/first-file
In addition to accessing files over HTTP, you can also retrieve completed downloads via SFTP. To make SFTP access easier, create a symlink in the SFTP user’s home directory that points to Deluge’s download folder:
sudo -u myftp ln -s /var/lib/deluge/Downloads/ /home/myftp/filesStep 3: Set Up Systemd Services
Running Deluge as a service ensures that it starts automatically at boot, runs under a dedicated, non-root user for enhanced security and automatically restarts itself in the event of a crash, guaranteeing maximum uptime and reliability.
This is achieved by defining two specific systemd unit files: one for the deluged daemon (the core engine) and one for the deluge-web interface (the remote access component), with each service to write to its own dedicated log file.
Create Systemd Unit Files
Create these two unit files in your /etc/systemd/system/ folder:
/etc/systemd/system/deluged.service
[Unit]
Description=Deluge Bittorrent Daemon
After=network-online.target

[Service]
Type=simple
User=deluge
Group=deluge
ExecStart=/usr/bin/deluged -d -l /var/lib/deluge/deluged.log -L warning
Restart=on-failure
RestartSec=5s

[Install]
WantedBy=multi-user.target
/etc/systemd/system/deluge-web.service
[Unit]
Description=Deluge Bittorrent Web UI
After=network-online.target

[Service]
Type=simple
User=deluge
Group=deluge
ExecStart=/usr/bin/deluge-web -d -l /var/lib/deluge/deluge-web.log -L warning
Restart=on-failure
RestartSec=5s

[Install]
WantedBy=multi-user.target
After creating the new unit files, systemd must be reloaded:
sudo systemctl daemon-reloadStart Deluge Services
Now that systemd has been reloaded, it’s time to launch deluged & deluge-web:
sudo systemctl enable deluged deluge-web
sudo systemctl start deluged deluge-web
Once the services are launched, check the status to ensure both are “active“:
sudo systemctl status deluged deluge-webTest Deluge
With both the deluged daemon and deluge-web interface running as services, your Deluge setup is now fully operational and ready to manage torrents.
To access the Deluge WebUI interface temporarily, open your web browser and navigate to Server IP address on port 8112 (e.g., http://your_server_ip:8112).
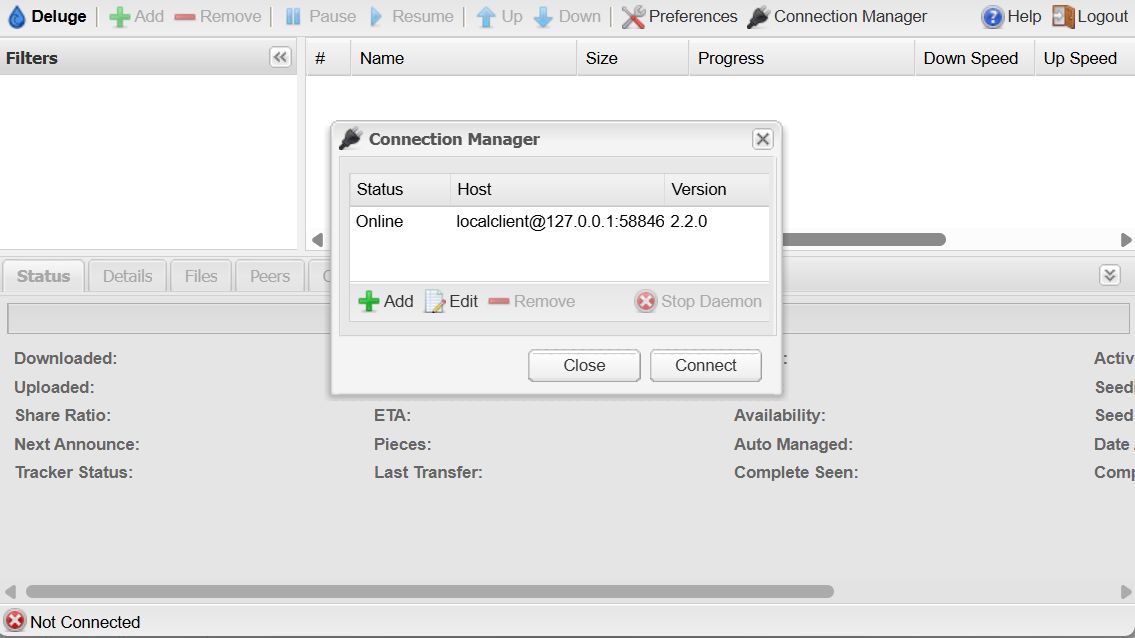
The default WebUI password is deluge; once logged in, you must connect to the local Deluge daemon running on 127.0.0.1.
Although this initial connection is unsecured HTTP, you may safely queue up your first downloads now.
The following steps will focus on permanently securing WebUI access by configuring Nginx as a reverse proxy and enabling HTTPS via Let’s Encrypt SSL.
Part 2 – Setup Nginx
Step 4: Install Nginx and Certbot
Now that the basics are setup, it’s time to make Deluge more user friendly by adding a Reverse Proxy to access Deluge-Web securely via HTTPS and adding a directory-based file browser to make downloading files from the server easier.
We’ll use Nginx as a reverse proxy to serve Deluge securely under HTTPS, and use CertBot to provide the SSL certificate.
Install Nginx
sudo apt-get install nginx snapd -y Install CertBot
sudo snap install --classic certbotFinally with Certbot installed, we can request a Let’s Encrypt certificate (replace my.domain.net with your (sub)domain):
sudo certbot --nginx -d my.domain.net --non-interactive --agree-tos --email admin@my.domain.netStep 5: Configure Nginx
Create your new Nginx config (e.g., /etc/nginx/sites-available/deluge.conf):
server {
    listen 80;
    listen [::]:80;
    server_name my.domain.net;

    # Redirect HTTP to HTTPS
    return 301 https://$host$request_uri;
}

server {
    listen 443 ssl;
    listen [::]:443 ssl;
    server_name my.domain.net;

    root /var/www/html;

    ssl_certificate /etc/letsencrypt/live/my.domain.net/fullchain.pem;
    ssl_certificate_key /etc/letsencrypt/live/my.domain.net/privkey.pem;
    ssl_protocols TLSv1.2 TLSv1.3;
    ssl_prefer_server_ciphers on;

    # Public file listing
    location /files {
        alias /var/lib/deluge/Downloads/;
        autoindex on;
        autoindex_exact_size off;
        autoindex_localtime on;
    }

    # Deluge Web UI
    location /deluge {
        proxy_pass http://localhost:8112/;
        proxy_set_header Host $host;
        proxy_set_header X-Real-IP $remote_addr;
        proxy_set_header X-Forwarded-For $proxy_add_x_forwarded_for;
        proxy_set_header X-Deluge-Base "/deluge/";
        add_header X-Frame-Options SAMEORIGIN;
    }
}
Replace all instances of my.domain.net with your actual (sub)domain.
Now we can disable the default site, and enable our new config file with a symlink:
rm -fv /etc/nginx/sites-enabled/default
sudo ln -s /etc/nginx/sites-available/deluge.conf /etc/nginx/sites-enabled/
Wipe the default nginx Index file:
sudo rm -fv  /var/www/html/index.nginx-debian.html
sudo echo > /var/www/html/index.htmltr
HTTP File Downloads
To enable HTTP-based file browsing and downloading, we’ll need to add the Nginx user to the Deluge user group, in order for Nginx to be able to read the Downloads directory.
The default username for Nginx on Ubuntu is www-data.
sudo usermod -aG deluge www-dataReload Nginx
Now we can verify the config file, and reload Nginx:
sudo nginx -t
sudo systemctl reload nginx
If Nginx reloaded succcessfully, you can now access your Deluge Reverse-Proxy, and /files/ download directory via HTTPS.
- Deluge Web UI →
https://my.domain.net/deluge/ - Download directory →
https://my.domain.net/files/
SSL will be renewed automatically ever 65 days via the snapd job.
Step 6: Secure Deluge
At this point, the initial installation process is complete and we’re ready to secure Deluge.
Update the default Deluge WebUI password.
The default Deluge WebUI password is deluge; this should be changed immediately.
You can update the default password via Deluge WebUI > Preferences > Interface.
Restrict Access to Deluge Port
Although we have setup a Nginx reverse-proxy to allow secure HTTPS access to the Deluge WebUI via /deluge/, the original port 8112 backend is still pubicly accessible, and it should be blocked.
Blocking port 8112 ensures the only way to access Deluge WebUI is via the secure Nginx reverse-proxy.
Setup deluge-firewall service
We can block access to Port 8112 via IP Tables without the need for an additional firewall like UFW or Firewalld.
To setup the firewall rules, create a new file – /etc/systemd/system/deluge-firewall.service – and add the following content:
[Unit]
Description=Firewall rules for Deluge
Before=deluge-web.service
Wants=network.target

[Service]
Type=oneshot

# ------------------------------
# Add rules when starting service
# ------------------------------
ExecStart=/bin/sh -c 'iptables -C INPUT -i lo -p tcp --dport 8112 -j ACCEPT 2>/dev/null || iptables -A INPUT -i lo -p tcp --dport 8112 -j ACCEPT'
ExecStart=/bin/sh -c 'iptables -C INPUT -p tcp --dport 8112 -j DROP 2>/dev/null || iptables -A INPUT -p tcp --dport 8112 -j DROP'

# ------------------------------
# Remove rules when stopping service
# ------------------------------
ExecStop=/bin/sh -c 'iptables -C INPUT -i lo -p tcp --dport 8112 -j ACCEPT 2>/dev/null && iptables -D INPUT -i lo -p tcp --dport 8112 -j ACCEPT'
ExecStop=/bin/sh -c 'iptables -C INPUT -p tcp --dport 8112 -j DROP 2>/dev/null && iptables -D INPUT -p tcp --dport 8112 -j DROP'

RemainAfterExit=yes

[Install]
WantedBy=multi-user.target
Start deluge-firewall service
After the unit file has been created, we must reload the Systemd daemon in order to enable the deluge-firewall service.
Enabling deluge-firewall as a service ensures the necessary firewall rules are automatically re-created when the server reboots.
sudo systemctl daemon-reload
sudo systemctl enable deluge-firewall
Start the deluge-firewall service
sudo systemctl start deluge-firewallNow the deluge-firewall has been started, the IP Tables will have been added to the firewall, and access to Port 8112 is restricted.
Test deluge-firewall
You can test this by accessing Port 8112 directly in your browser, (e.g., http://your_server_ip:8112), it should not load.
$ curl http://my.ip.addresss:8112/
curl: (28) Failed to connect to my.ip.address port 8112 after 133065 ms: Couldn't connect to server
Disable deluge-firewall
If for any reason you need to directly access the Deluge WebUI via Port 8112, you can stop the deluge-firewall service to temporarily deactivate it:
sudo systemctl stop deluge-firewallOnce stopped, Port 8112 will be directly accessible from the Internet.
To disable the deluge-firewall permanently, disable the service:
sudo systemctl disable deluge-firewallOther Enhancements
Auto Select Deluge Daemon
Deluge can be configured to automatically select the localhost daemon in the WebUI.
To automatically connect to localhost, locate hostlist.conf within the Deluge .config directory.
Open the hostlist.conf find your ID, it’ll be the first entry in hostlist:
...
      "123459d5a5b414159caa1323f6e0c9b240c7abcd",
      "localhost",
      58846,
...
Once you have the ID, stop the Web UI in order to modify the web.conf file.
sudo systemctl stop deluge-webLocate the "default_daemon" option inside of web.conf, and set its value to the daemon id from hostlist.conf
"default_daemon": "123459d5a5b414159caa1323f6e0c9b240c7abcd",Save your changes, and restart the Web UI.
sudo systemctl start deluge-webDeluge will now automatically connect to the local Deluged daemon when you login to the WebUI, without being prompted to select a Server.
SSH
- Add your SSH key(s) to the root, and download users
~/.ssh/authorized_keysfile - Restrict SSH access to keys-only by updating /etc/ssh/sshd_config to include:
- PermitRootLogin without-password
- PasswordAuthentication no
# Force PermitRootLogin to 'without-password'
sudo sed -i.original_config -r '/^\s*PermitRootLogin\s+/d' /etc/ssh/sshd_config
sudo echo "PermitRootLogin without-password" | sudo tee -a /etc/ssh/sshd_config

# Force PasswordAuthentication to 'no'
sudo sed -i -r '/^\s*PasswordAuthentication\s+/d' /etc/ssh/sshd_config
sudo echo "PasswordAuthentication no" | sudo tee -a /etc/ssh/sshd_config
Now check the settings are properly set:
# Check that these new settings are correctly set
sudo grep -E '^\s*(PermitRootLogin|PasswordAuthentication)\s+' /etc/ssh/sshd_config
We should see the following:
~# sudo grep -E '^\s*(PermitRootLogin|PasswordAuthentication)\s+' /etc/ssh/sshd_config
PermitRootLogin without-password
PasswordAuthentication no
If everything looks right, restart the SSH daemon
# Restart the SSH daemon
sudo systemctl restart ssh
Server Time
It’s recommended to set the server’s timezone to your local timezone (or to UTC).
Setting the correct timezone ensures that file modification times and timestamps in logs align with your local machine, improving consistency when integrating with other tools and making log review and troubleshooting much easier.
To see a list of timezones, use timedatectl list-timezones:
sudo timedatectl list-timezonesOnce you have determined the local time zone, you can set the server’s local time zone to match via timedatectl set-timezone.
To set the server time to UTC:
sudo timedatectl set-timezone UTCMost servers will be configured to automatically sync the time via NTP; you can check the time sync status via timedatectl
# timedatectl
               Local time: Sat 2025-11-15 20:44:12 EST
           Universal time: Sun 2025-11-16 01:44:12 UTC
                 RTC time: Sun 2025-11-16 01:44:12
                Time zone: America/New_York (EST, -0500)
System clock synchronized: yes
              NTP service: active
          RTC in local TZ: no
If the NTP service is inactive or otherwise stopped, you can re-enable it via set-ntp true:
sudo timedatectl set-ntp trueAutomatic OS Package Updates
Keep your system updated automatically with the unattended-upgrades package.
Install the unattended-upgrades package (if not already installed):
sudo apt update
sudo apt install -y unattended-upgrades
When prompted to Automatically download and install stable updates? – Select “Yes“.
If the package is already installed, use dpkg-reconfigure to re-configure the automatic update settings:
sudo dpkg-reconfigure unattended-upgradesEnable Automatic Reboot [Optional]
Note that unattended-upgrades will not automatically reboot the VPS; you may want to enable this and configure a specific reboot time in the unattended-upgrades config:
# Set unattended-upgrades to automatically reboot if necessary
# This changes the line //Unattended-Upgrade::Automatic-Reboot "false"; to true
sudo sed -i 's/\/\/Unattended-Upgrade::Automatic-Reboot "false";/Unattended-Upgrade::Automatic-Reboot "true";/' /etc/apt/apt.conf.d/50unattended-upgrades

# Set the time for the reboot (e.g., 2 AM)
# This changes the line //Unattended-Upgrade::Automatic-Reboot-Time "02:00";
sudo sed -i 's/\/\/Unattended-Upgrade::Automatic-Reboot-Time "02:00";/Unattended-Upgrade::Automatic-Reboot-Time "04:00";/' /etc/apt/apt.conf.d/50unattended-upgrades
Troubleshooting
Nginx shows 502 Bad Gateway
- Check if the Deluge Web service is running:
systemctl status deluge-web- If not, restart it:
sudo systemctl restart deluge-web- Verify it’s listening on port 8112:
netstat -tulpn | grep 8112Permission errors with downloads
- Ensure your user is part of the
delugegroup:
sudo usermod -aG deluge yourusername- Log out and back in for group changes to take effect.
Deluge Web UI not loading properly under /deluge/
- Make sure the
proxy_set_header X-Deluge-Base "/deluge/";line is included in your Nginx config. - Clear browser cache or try incognito mode to rule out cached redirects.
SSL certificate issues
- Ensure your domain’s DNS points to your VPS before running Certbot.
- If renewal fails, you can manually renew:
sudo certbot renew --dry-runConclusion
You now have a Deluge seedbox running behind Nginx with HTTPS. This setup is secure, easy to manage, and lets you remotely control your torrents while also serving completed downloads via the web.
Leave a Reply